
跳跳蛙手工折纸步骤图解
第一步:
将正方形彩纸折出十字折痕,然后对折长双层长方形,将长方形左右两边的正方形分别对折出X折痕,如图1所示:
第二步:
将图1中的X折痕向内折折压成双层的三角形,整体变成了一个小正方形,如图2所示:
第三步:
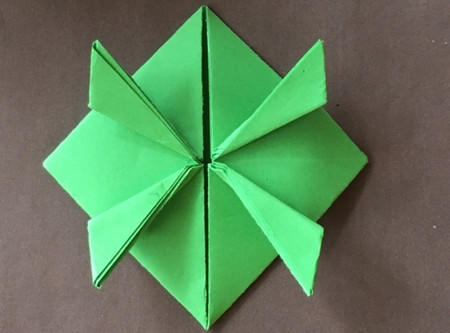
将图2中正面的4个45°角分别向横向中间线对折成三角形,然后将这个三角形反向对折,这里折出来的就是青蛙的四肢和肚皮了,如图3、4所示:


2
跳跳蛙折纸步骤图解
第四步:
将折纸翻过来,正面是一个平整的正方形,选择左右两部分任意两条相邻的边向对角线折痕平行对折,折出2个直角三角形,如图5、6所示:
第五步:
将图6三角形向左边对折成三角形,如图7所示:


3
跳跳蛙折纸步骤图解
第六步:
将折纸翻到背面,将肚皮竖着的折痕向内压实,然后翻到正面,将这条折痕用笔画出来了,接着在将这条线于底边平行对折,形成了一个谷折状态,如图9所示:
第七步:
用白色的纸剪出2个小圆形,用笔画出眼珠,用白胶固定在合适的位置,一只可爱的跳跳蛙就折好了。

更多折纸教程图解,手工折纸步骤,可前往【手工折纸栏目专区】查看